This has nothing to do with writing, sorry.
A few weeks ago, a friend of mine wanted to know how to bake bread. He thought you couldn’t make it at home without “specialized pans and materials.” I was so aghast I took pictures of the entire process just to prove how easy it was.
I really should have asked what he thought was so fancy-pantsy about it, because seriously. What’s special? The bread pan? I had a bread pan way before I ever made an actual loaf of bread. I used it for meatloaf.
Anyway, I have a huge pet peeve that kicks in whenever someone says “I don’t know how to [cook/bake something], but I assume it’s so hard I could never do it.” I will whine about that some other day. Because right now I’m going to post my lame pictures in hopes that it might help someone, somewhere, realize that it’s not that hard. It’s just, you know… slow.
All you need is:
- A bread pan
- Cooking spray (I use Pam Original.)
- An awesome recipe (I included my favorite one beneath the fold)
- Optional: A bread machine
Oh yeah. And about 3 hours of time.
Here’s how to do it!
OK, first you need a recipe. My favorite bread book is 250 Best Canadian Bread Machine Baking Recipes, by Donna Washburn and Heather Butt. I picked it up on a trip to Vancouver, and I have never regretted it. Everything in here is AMAZING.
And my favorite is the extremely basic Old-Fashioned Wheat Bread:
- 1 and 1/2 cups water
- 1/4 cup skim milk powder*
- 1 and 1/2 teaspoons salt
- 2 Tablespoons liquid honey
- 1 Tablespoon molasses
- 2 Tablespoons vegetable oil
- 2 and 1/2 cups whole wheat flour
- 1 cup all-purpose flour
- 1 teaspoon yeast
* I know people who would see this and go, “Oh, I don’t have powdered milk! I’ll just use real milk!” No. Don’t do that. I’m pretty sure that you’d need to reduce the water for that to work. Your bread’s life is in your hands if you decide to make that work.
Without a Bread Machine
I’ve… never tried this recipe without a bread machine. This is because I’m lazy. But I’ve made a fair amount of bread by hand, and if I were going to do it, this is how I would:
- Make sure the water is warm. (Crank your faucet to hot water and wait until it’s very warm. Make sure it’s not so hot you can’t touch it.) Add the water, honey, and yeast in a small cup. Mix thoroughly.
- In a larger bowl, mix all the dry ingredients.
- If your yeast is alive, it should foam up in about 5 minutes or so. Dump all of this into the flour mixture. Add the veggie oil and molasses.
- Mix it together until it forms into a ball.
- Transfer it to a baking mat and knead. KNEAD! Knead it for about 10 minutes. Watch some TV or something! Work those arms!
- Cover and let it rise in a warm place for an hour.
- The dough should now have risen. It’ll be big and fat, but most of that is just air. Punch down the dough (which means, yes, put your fist in the dough to deflate it.) Then skip down to the pictures below!
With a Bread Machine
This way is awesome!
- Put the ingredients in your machine in the order your machine takes them. Mine goes: Liquids on the bottom, flours in the middle, yeast sprinkled on top.
- Put your bread machine on “Dough” mode. Go and do something else for an hour-and-a-bit.
- When it’s done, dump the dough on a baking mat. Cover and let it rest for 15 minutes.
- Then follow the pictures below!
The Rest of the Process, With Pictures!


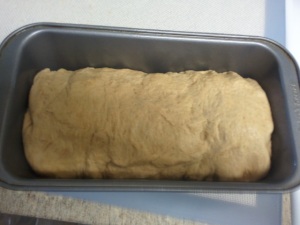
At this point, you cover the bread and let it rest for another 30 minutes.
Yes, that’s right. More rising. Hurray!
During the last 10 minutes of rising, pre-heat the oven to 350F. When everything’s done, pop that baby in the oven for 40-50 minutes.

If you greased up the pan well, then you should be able to just dump the bread out of the pan. It’s done when your bread sounds hollow when tapped on the bottom.
And that’s it! It’s really not as hard as it sounds, especially if you have a bread machine. And there is my photographic proof that you don’t need anything fancy to make bread. Just, you know, time and a bread pan.

Awww, the pictures here are making me hungry! lol
Thank you! :D